


Photograph Enhancement
We offer two types of Photo Enhancement - Basic and Full.
The following samples will give you an idea of the difference in the
results achieved. Please be patient as it may take a little time to
fully load the page.
The differences are not always obvious on a web page but you can zoom in to the webpage by using the Ctrl key and + (plus) key at the same time. Keep on clicking until you are fully zoomed in. To get back to 100% simply use Ctrl and - (minus) key.
You may prefer to download Samples 1-4 from here and Samples 5 from here. Each sample can then be viewed in your own Picture Viewer program and you will easily see the difference in quality by zooming in to the picture.
You can also download individual samples by right clicking the image and choosing "Save picture as" to save the sample to your desktop.
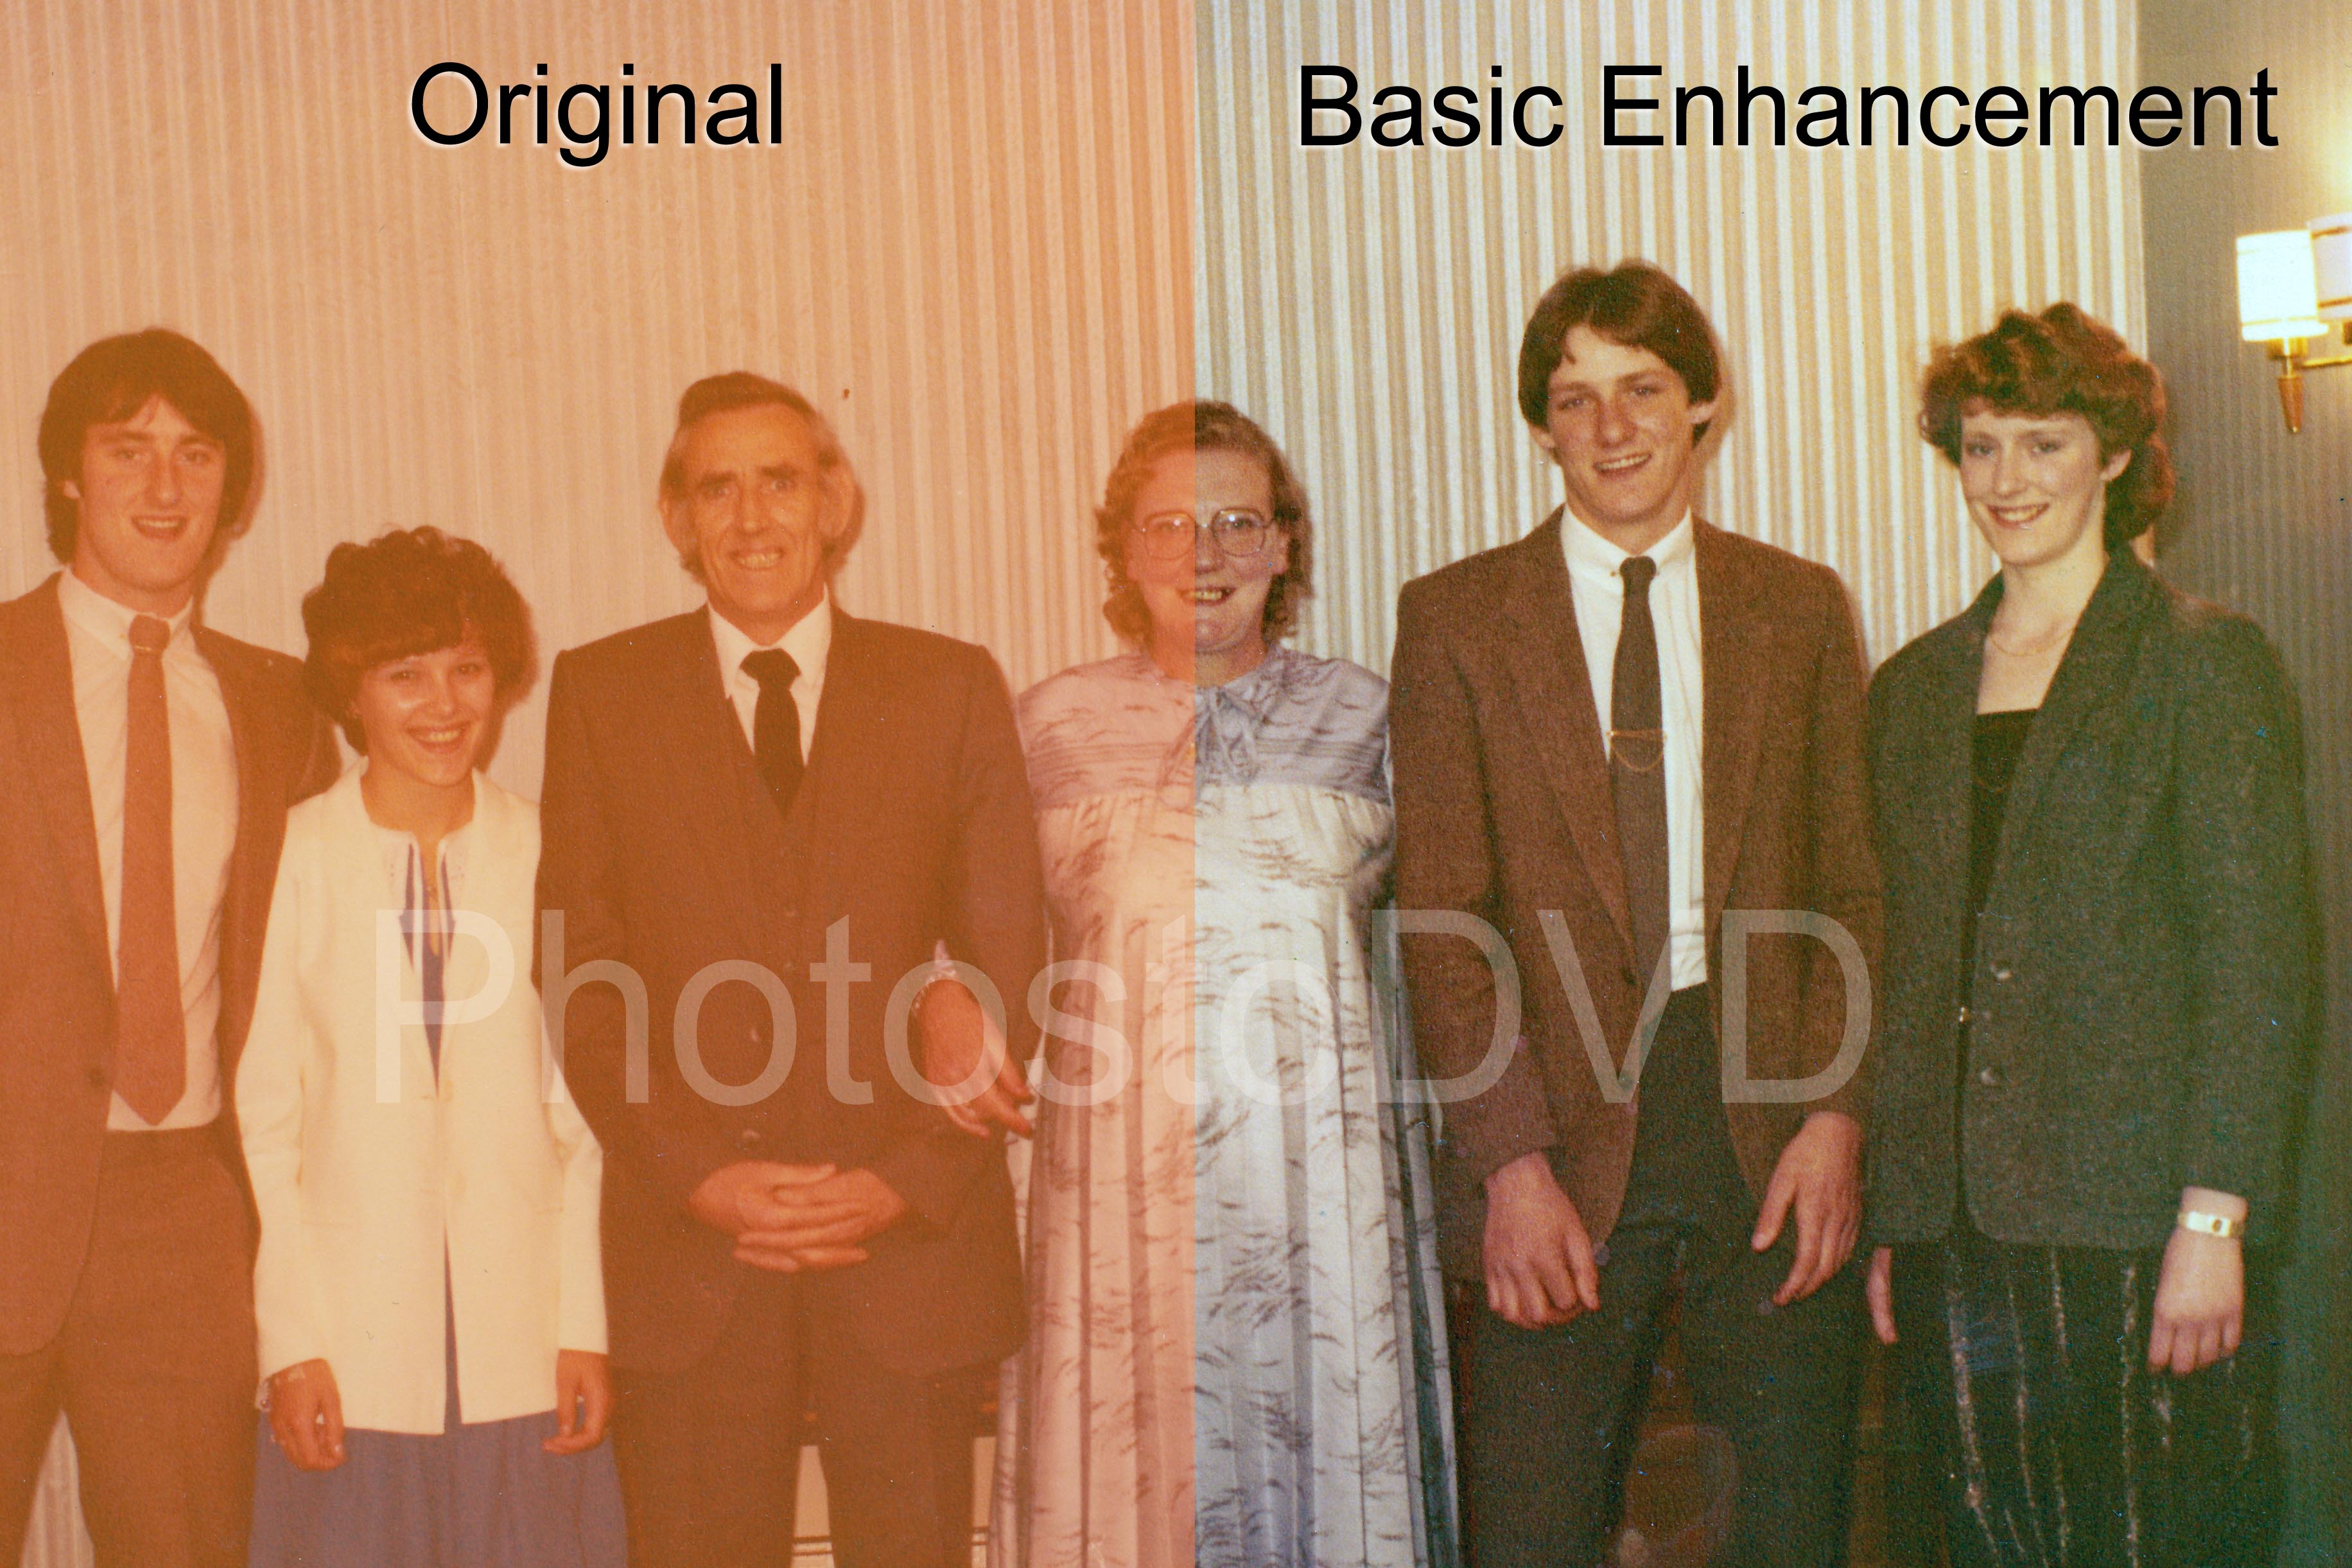
Sample 1:Faded photographs are brought back to life. The colour cast is also removed.
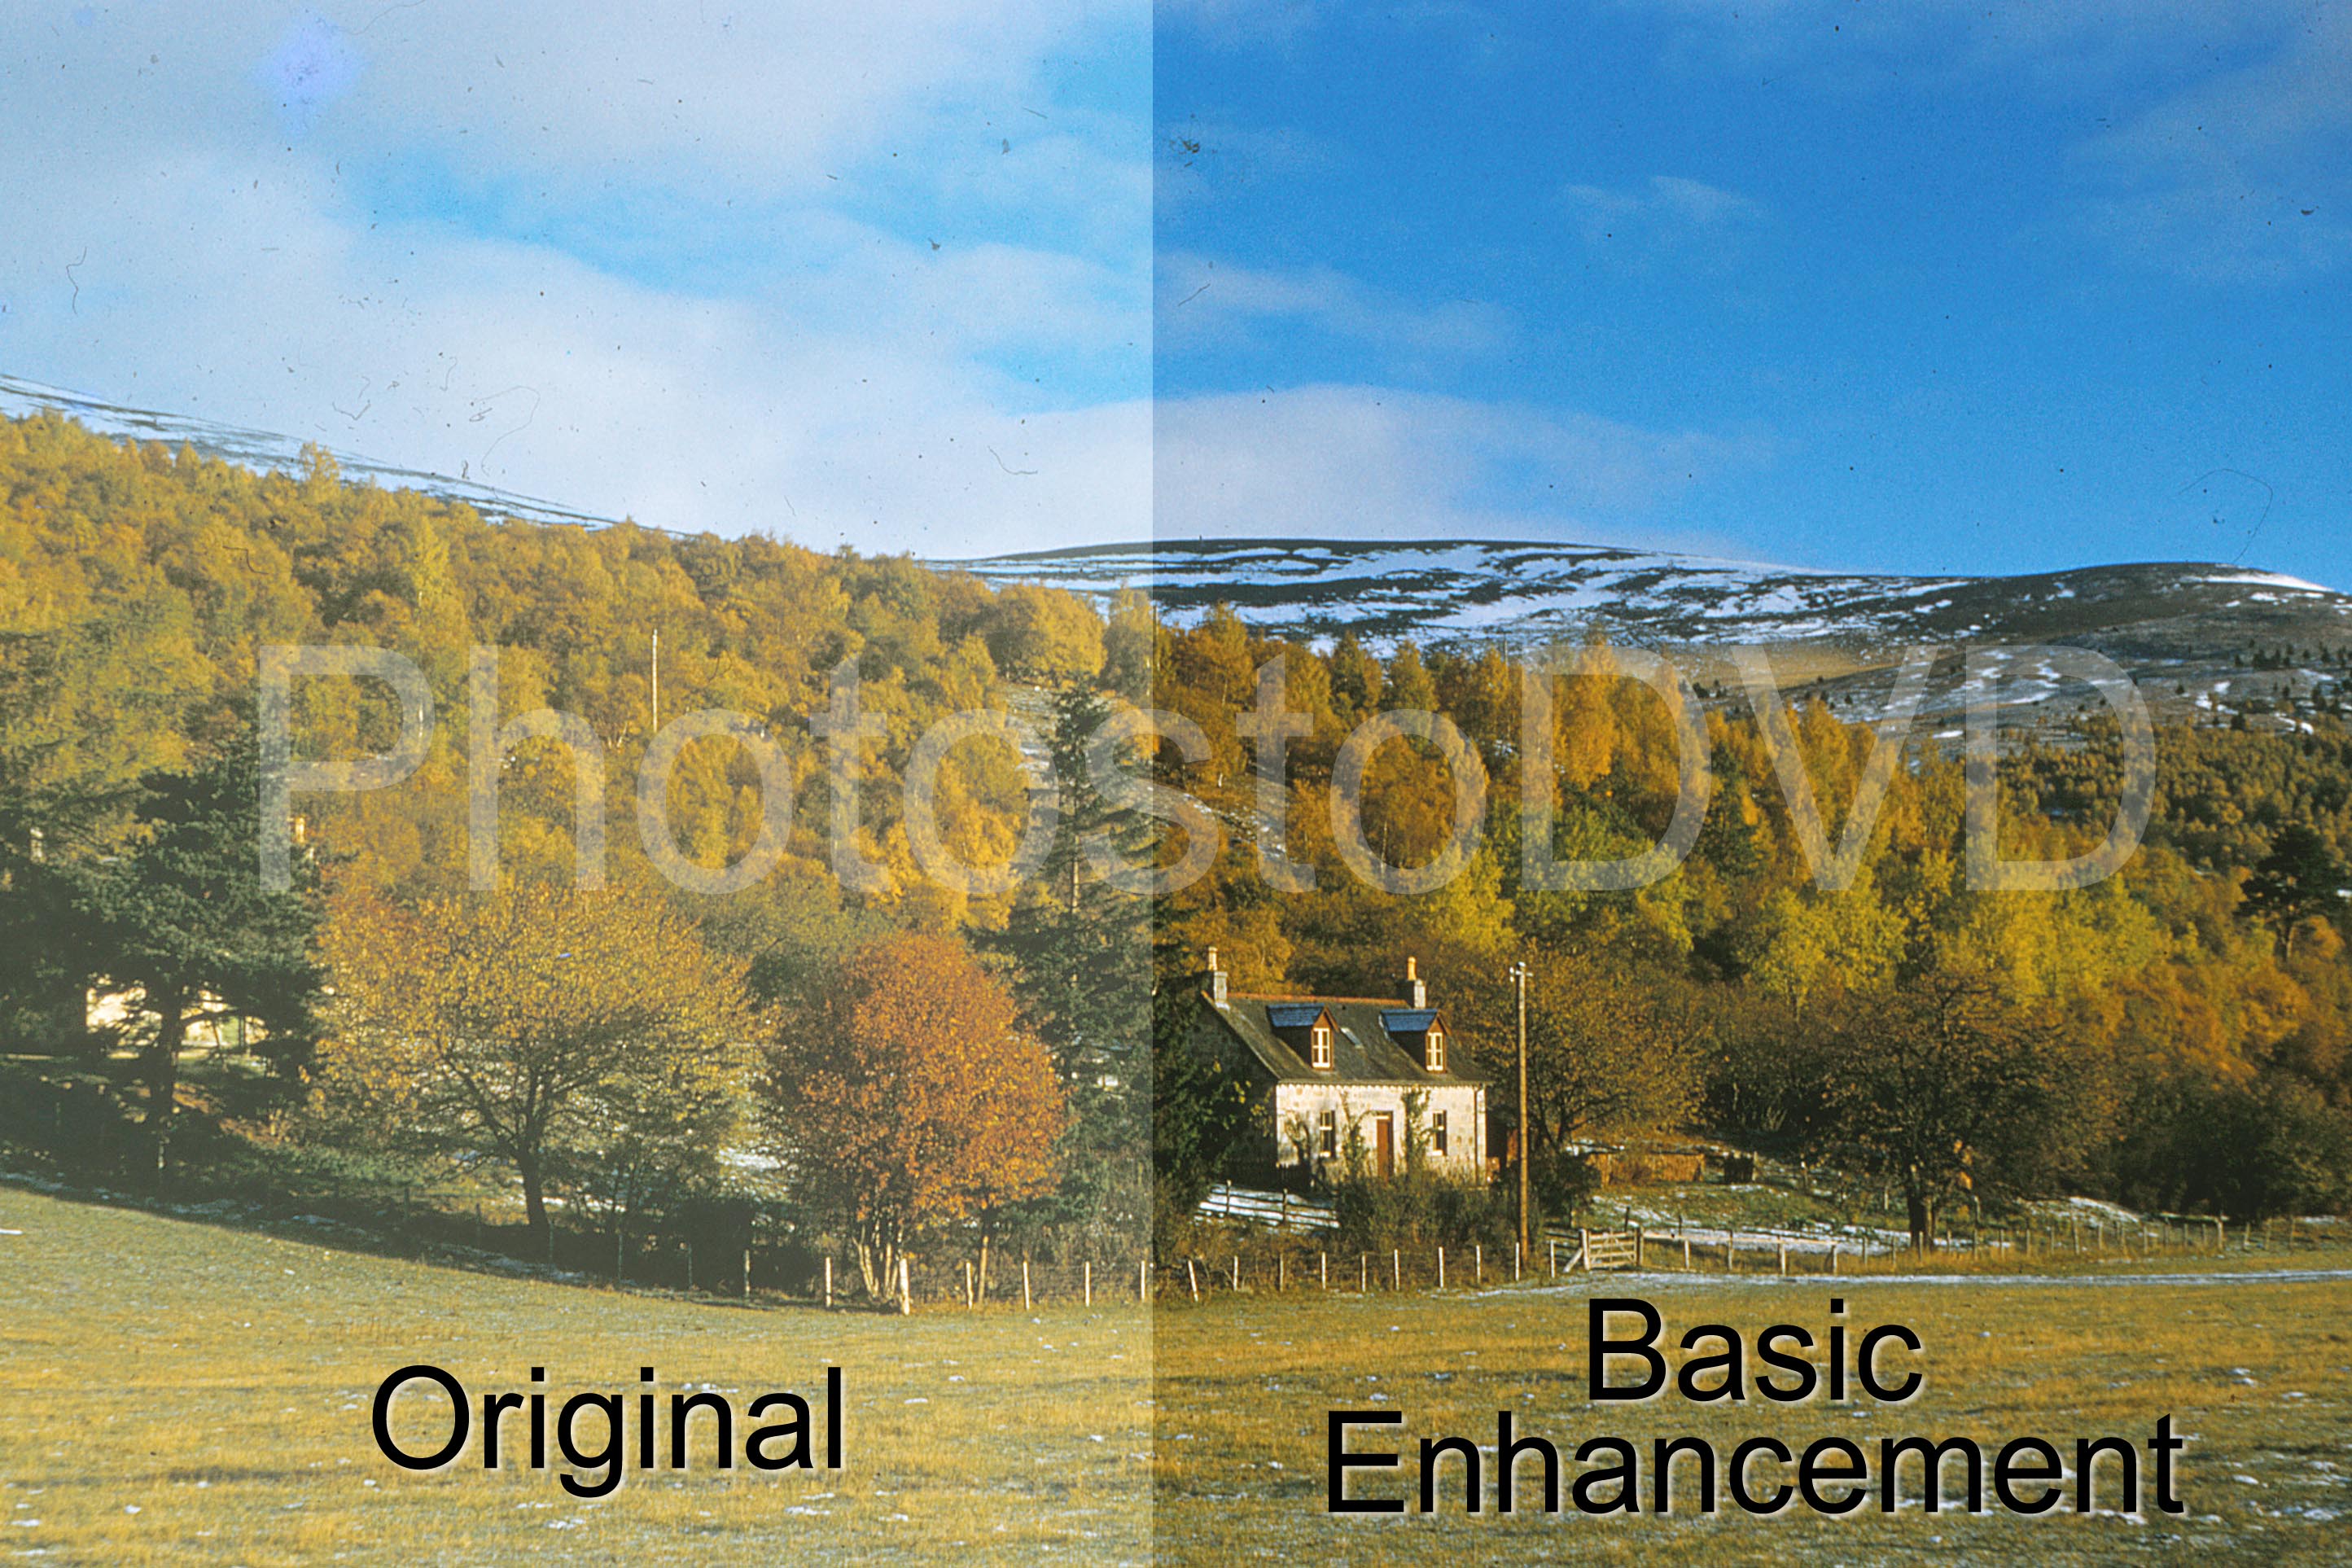
Sample 2:
This shows how the Basic Enhancement can be used in a 35mm
scanned slide to give the photo more depth and remove minor blemishes
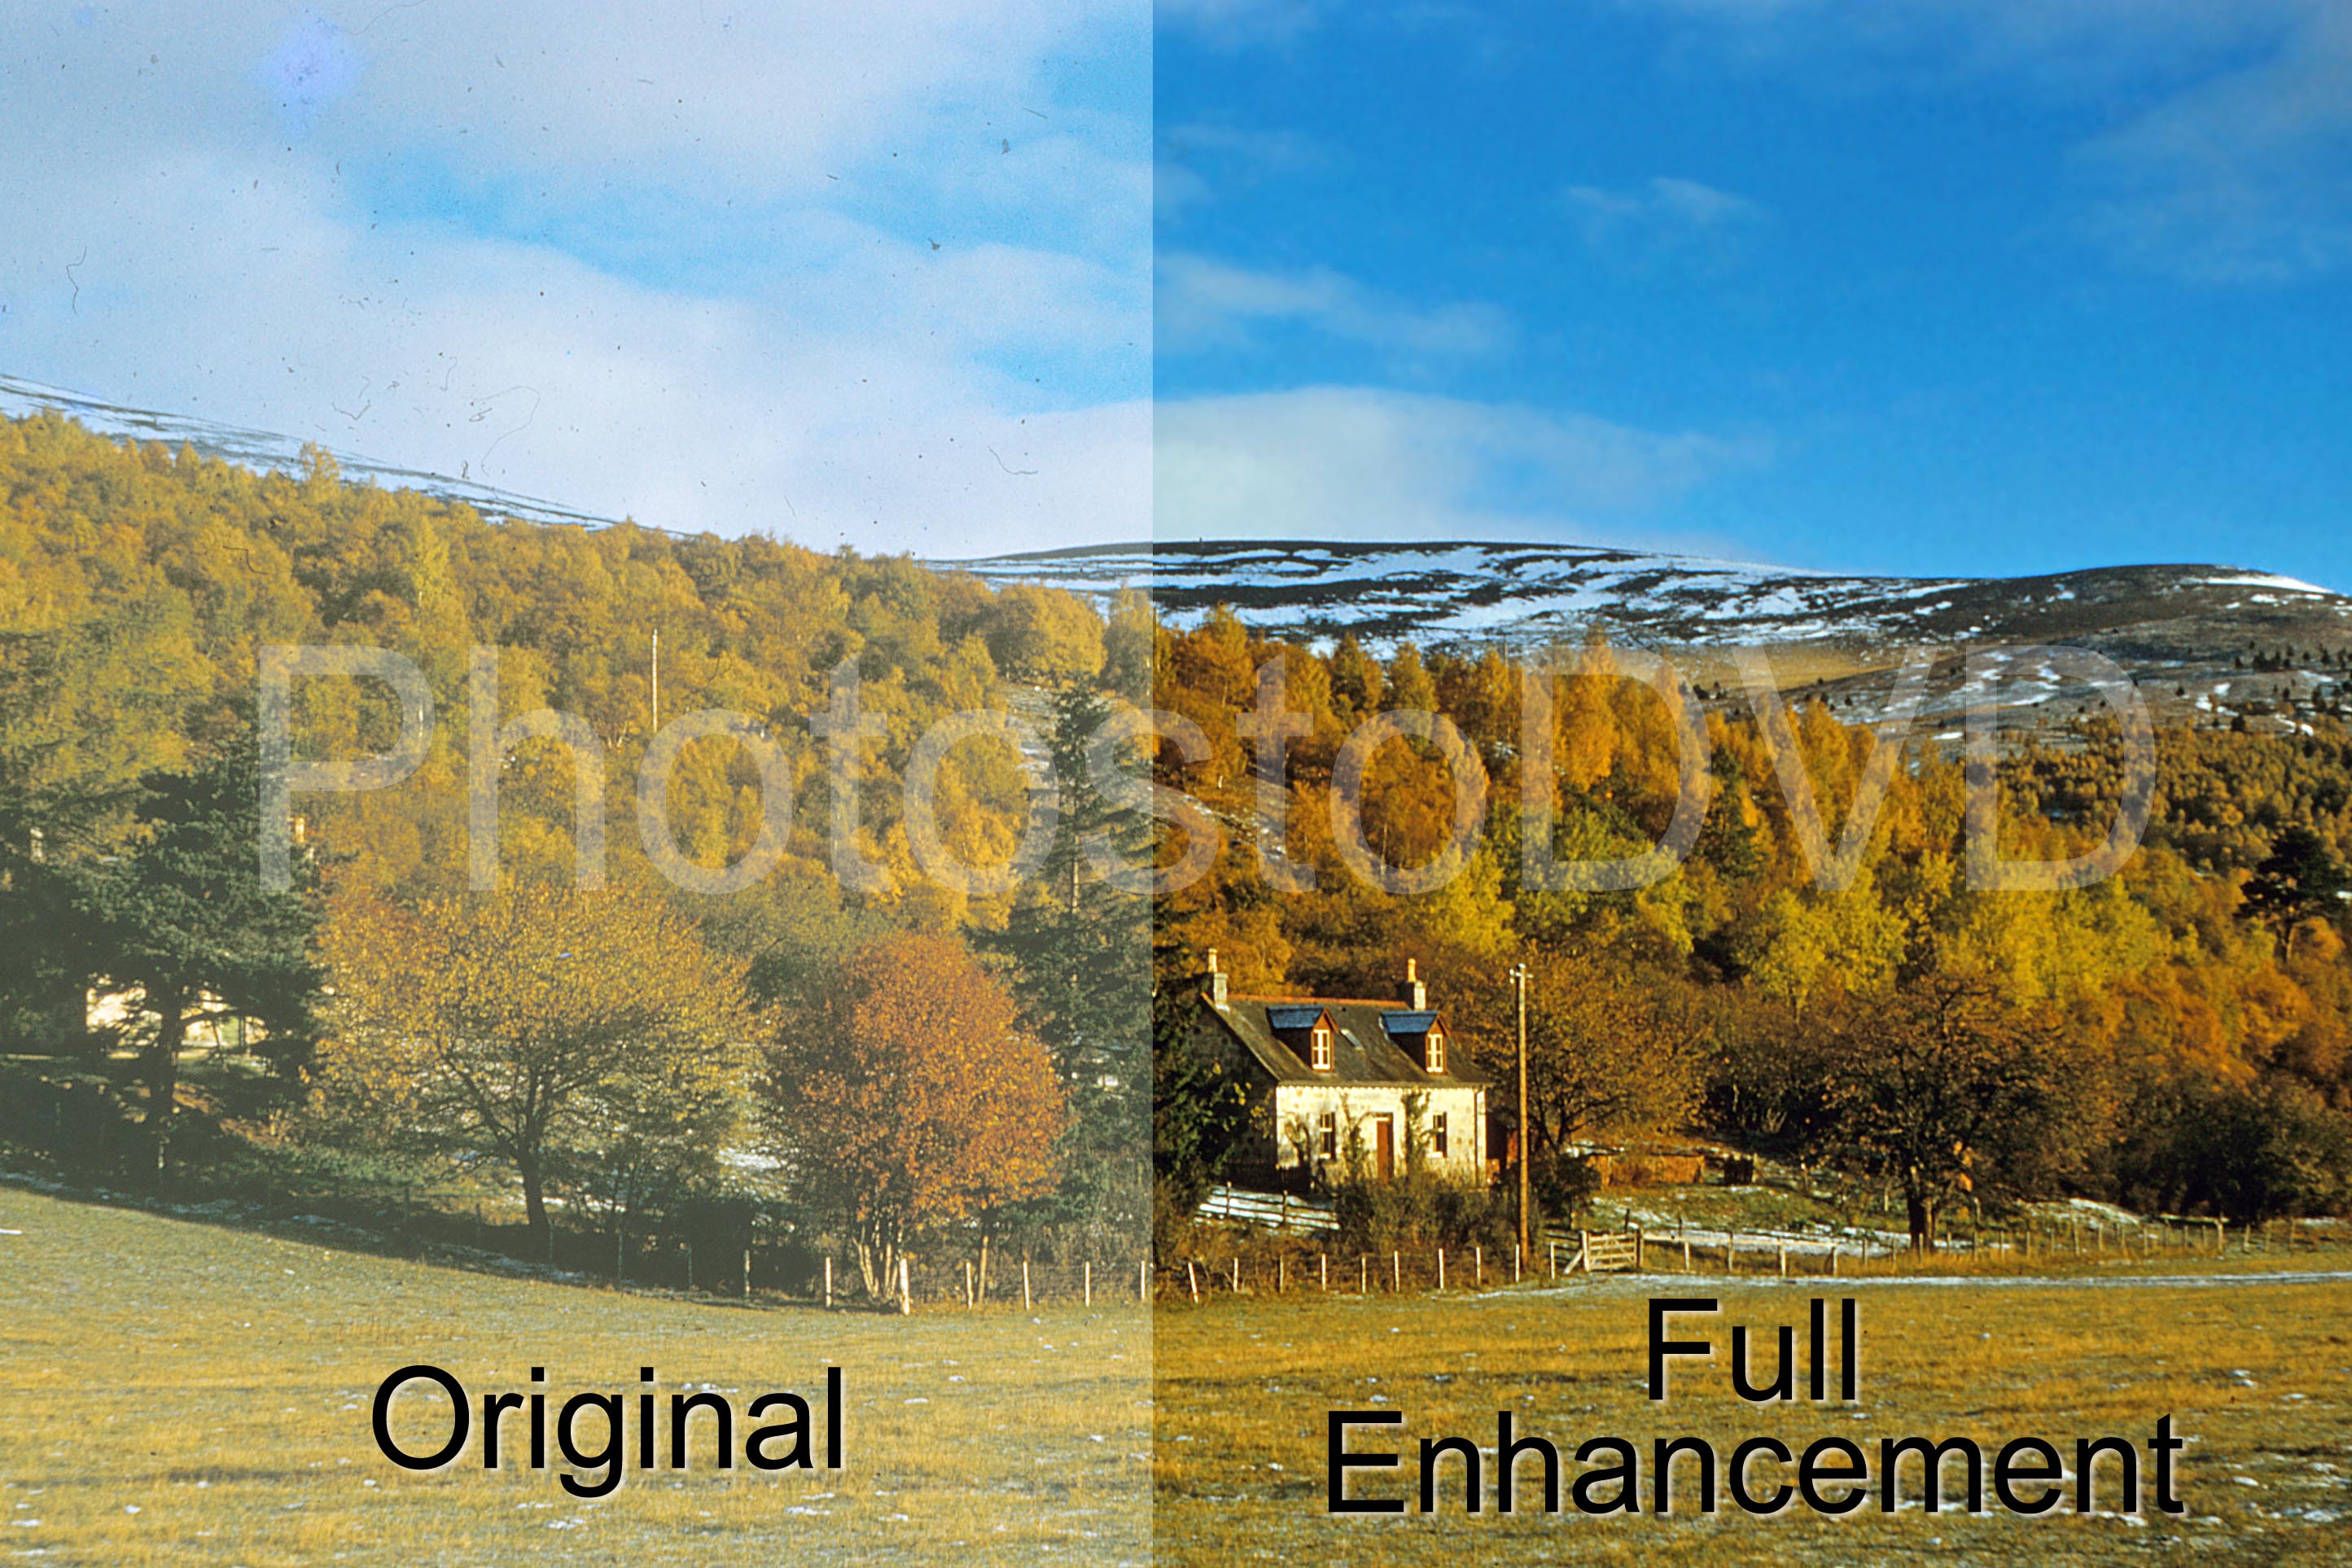
Sample 3:
The same scanned slide with the full treatment. Notice how the
sky is now clear of dust and scratches and the house is much sharper.
Sample 4:
These next two photos show how a slightly out of focus picture
can have more detailed added and also redeye from the flash has been
removed.

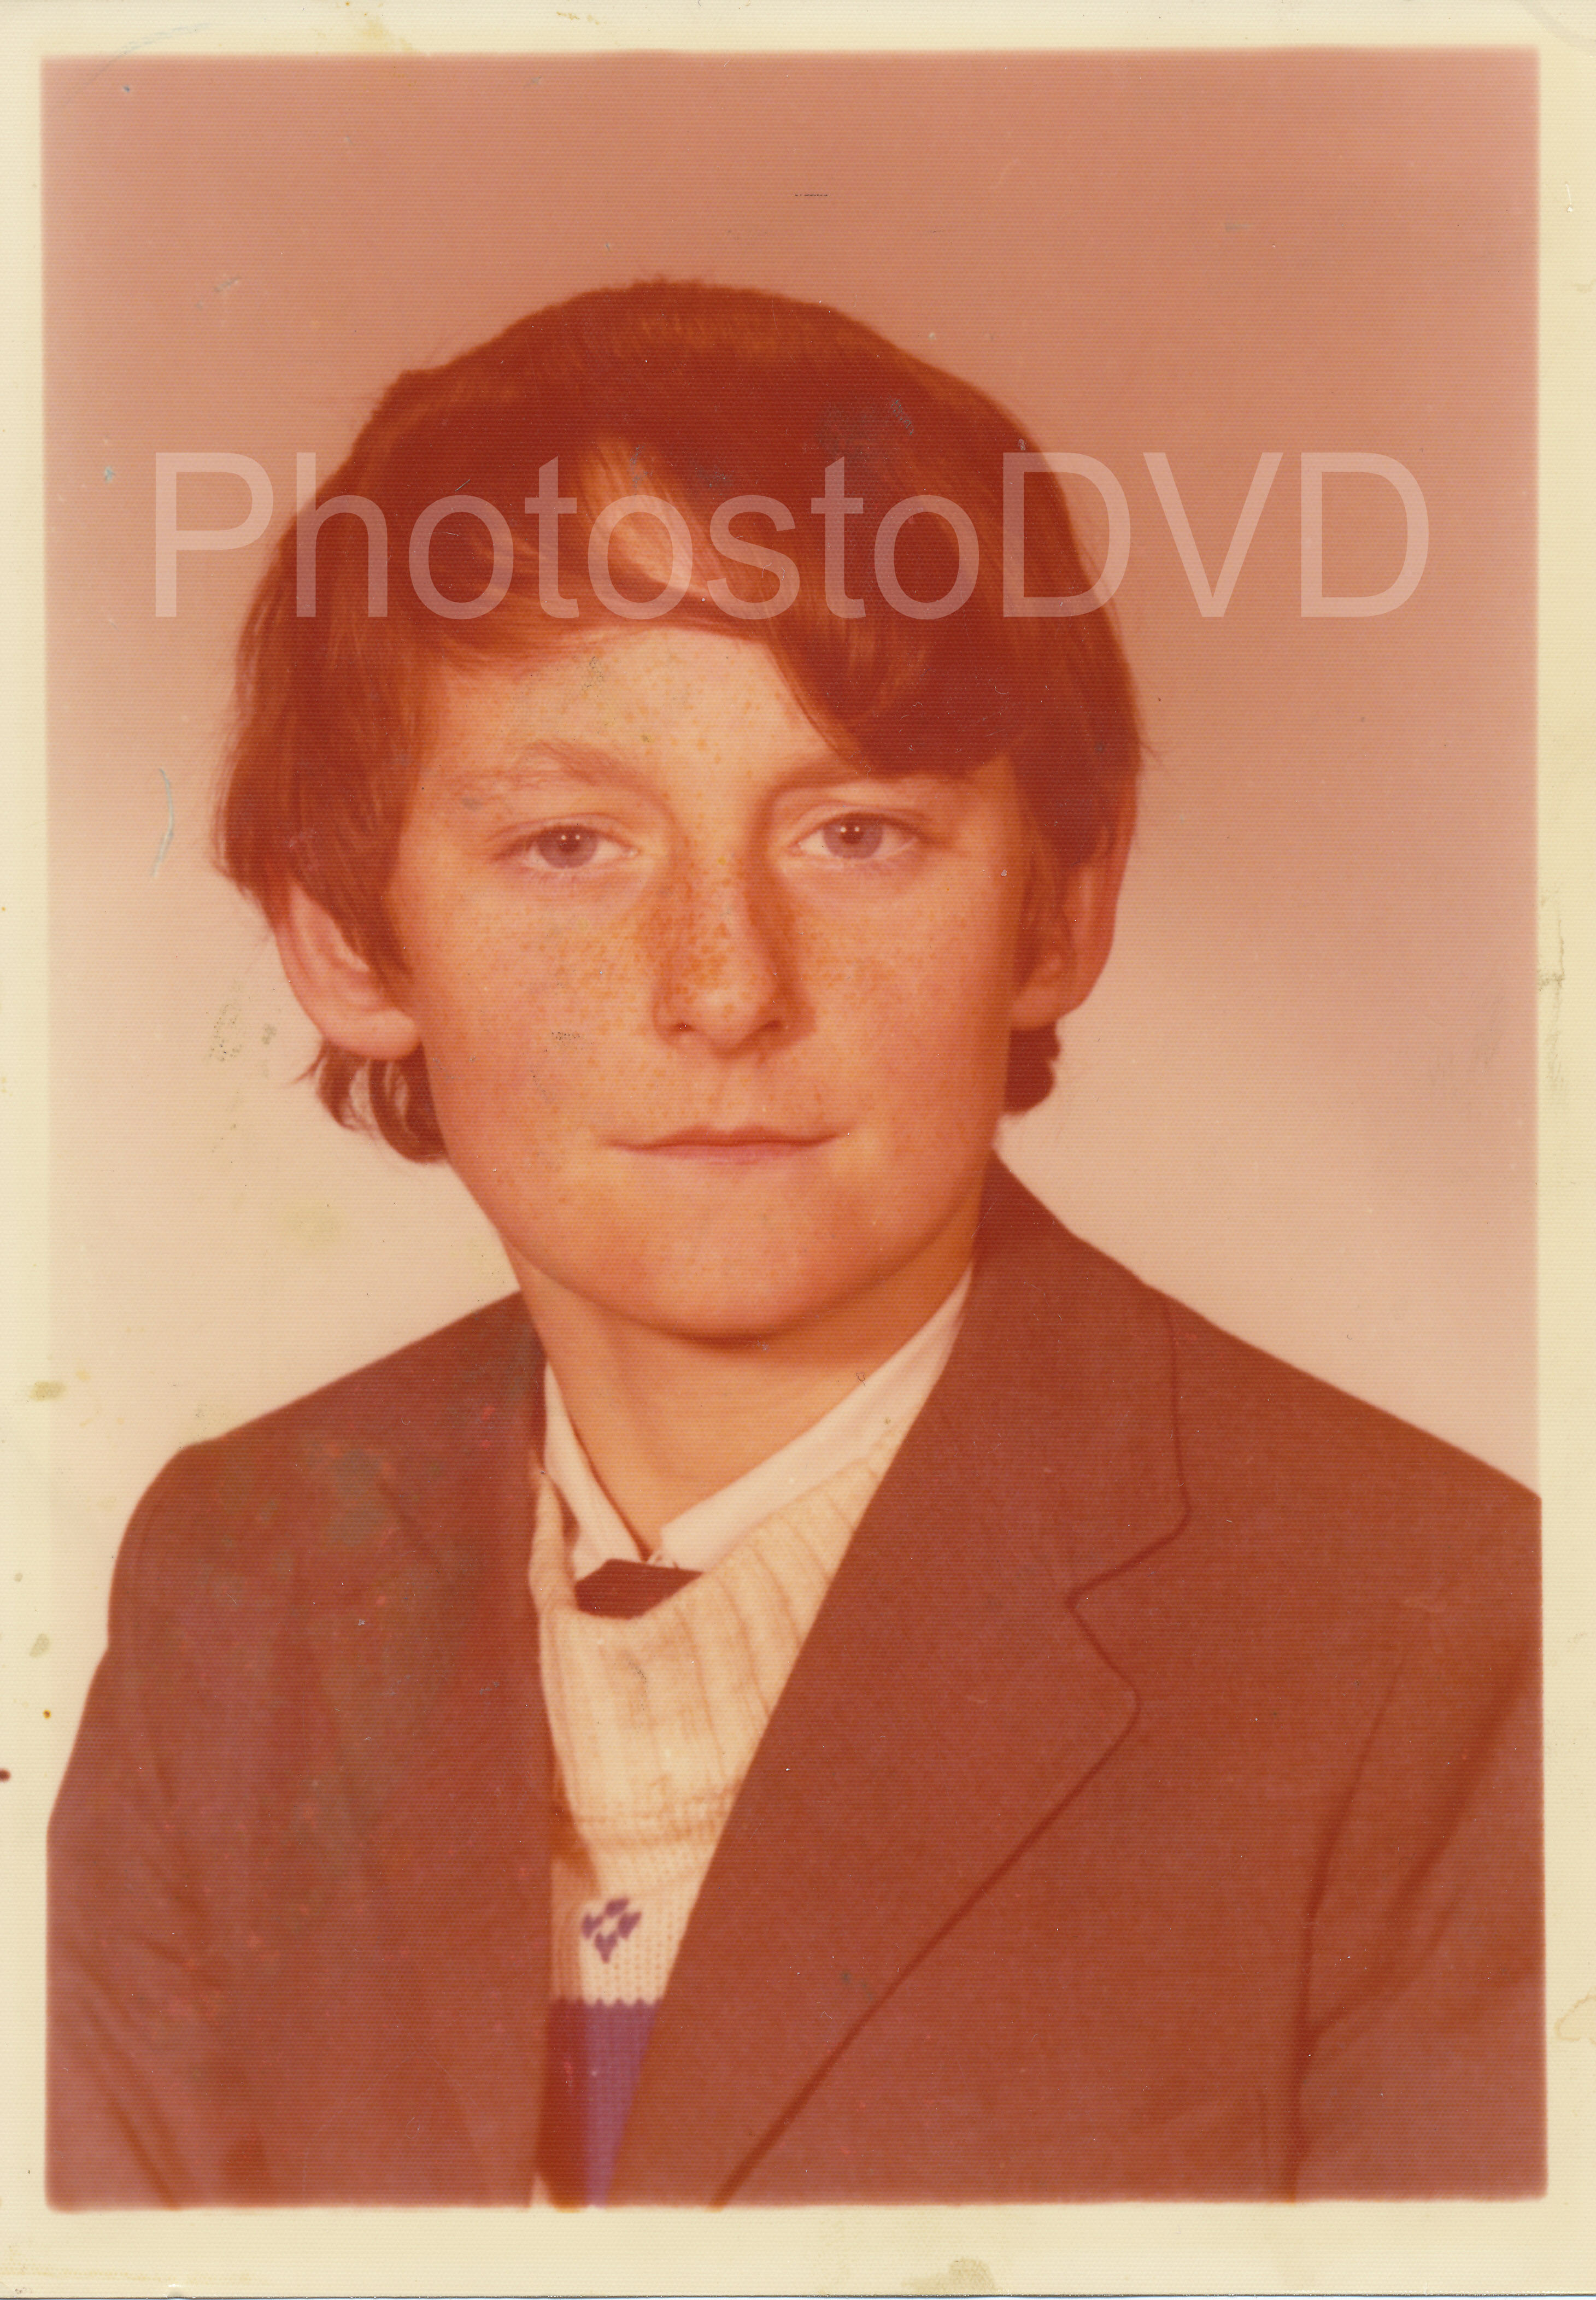
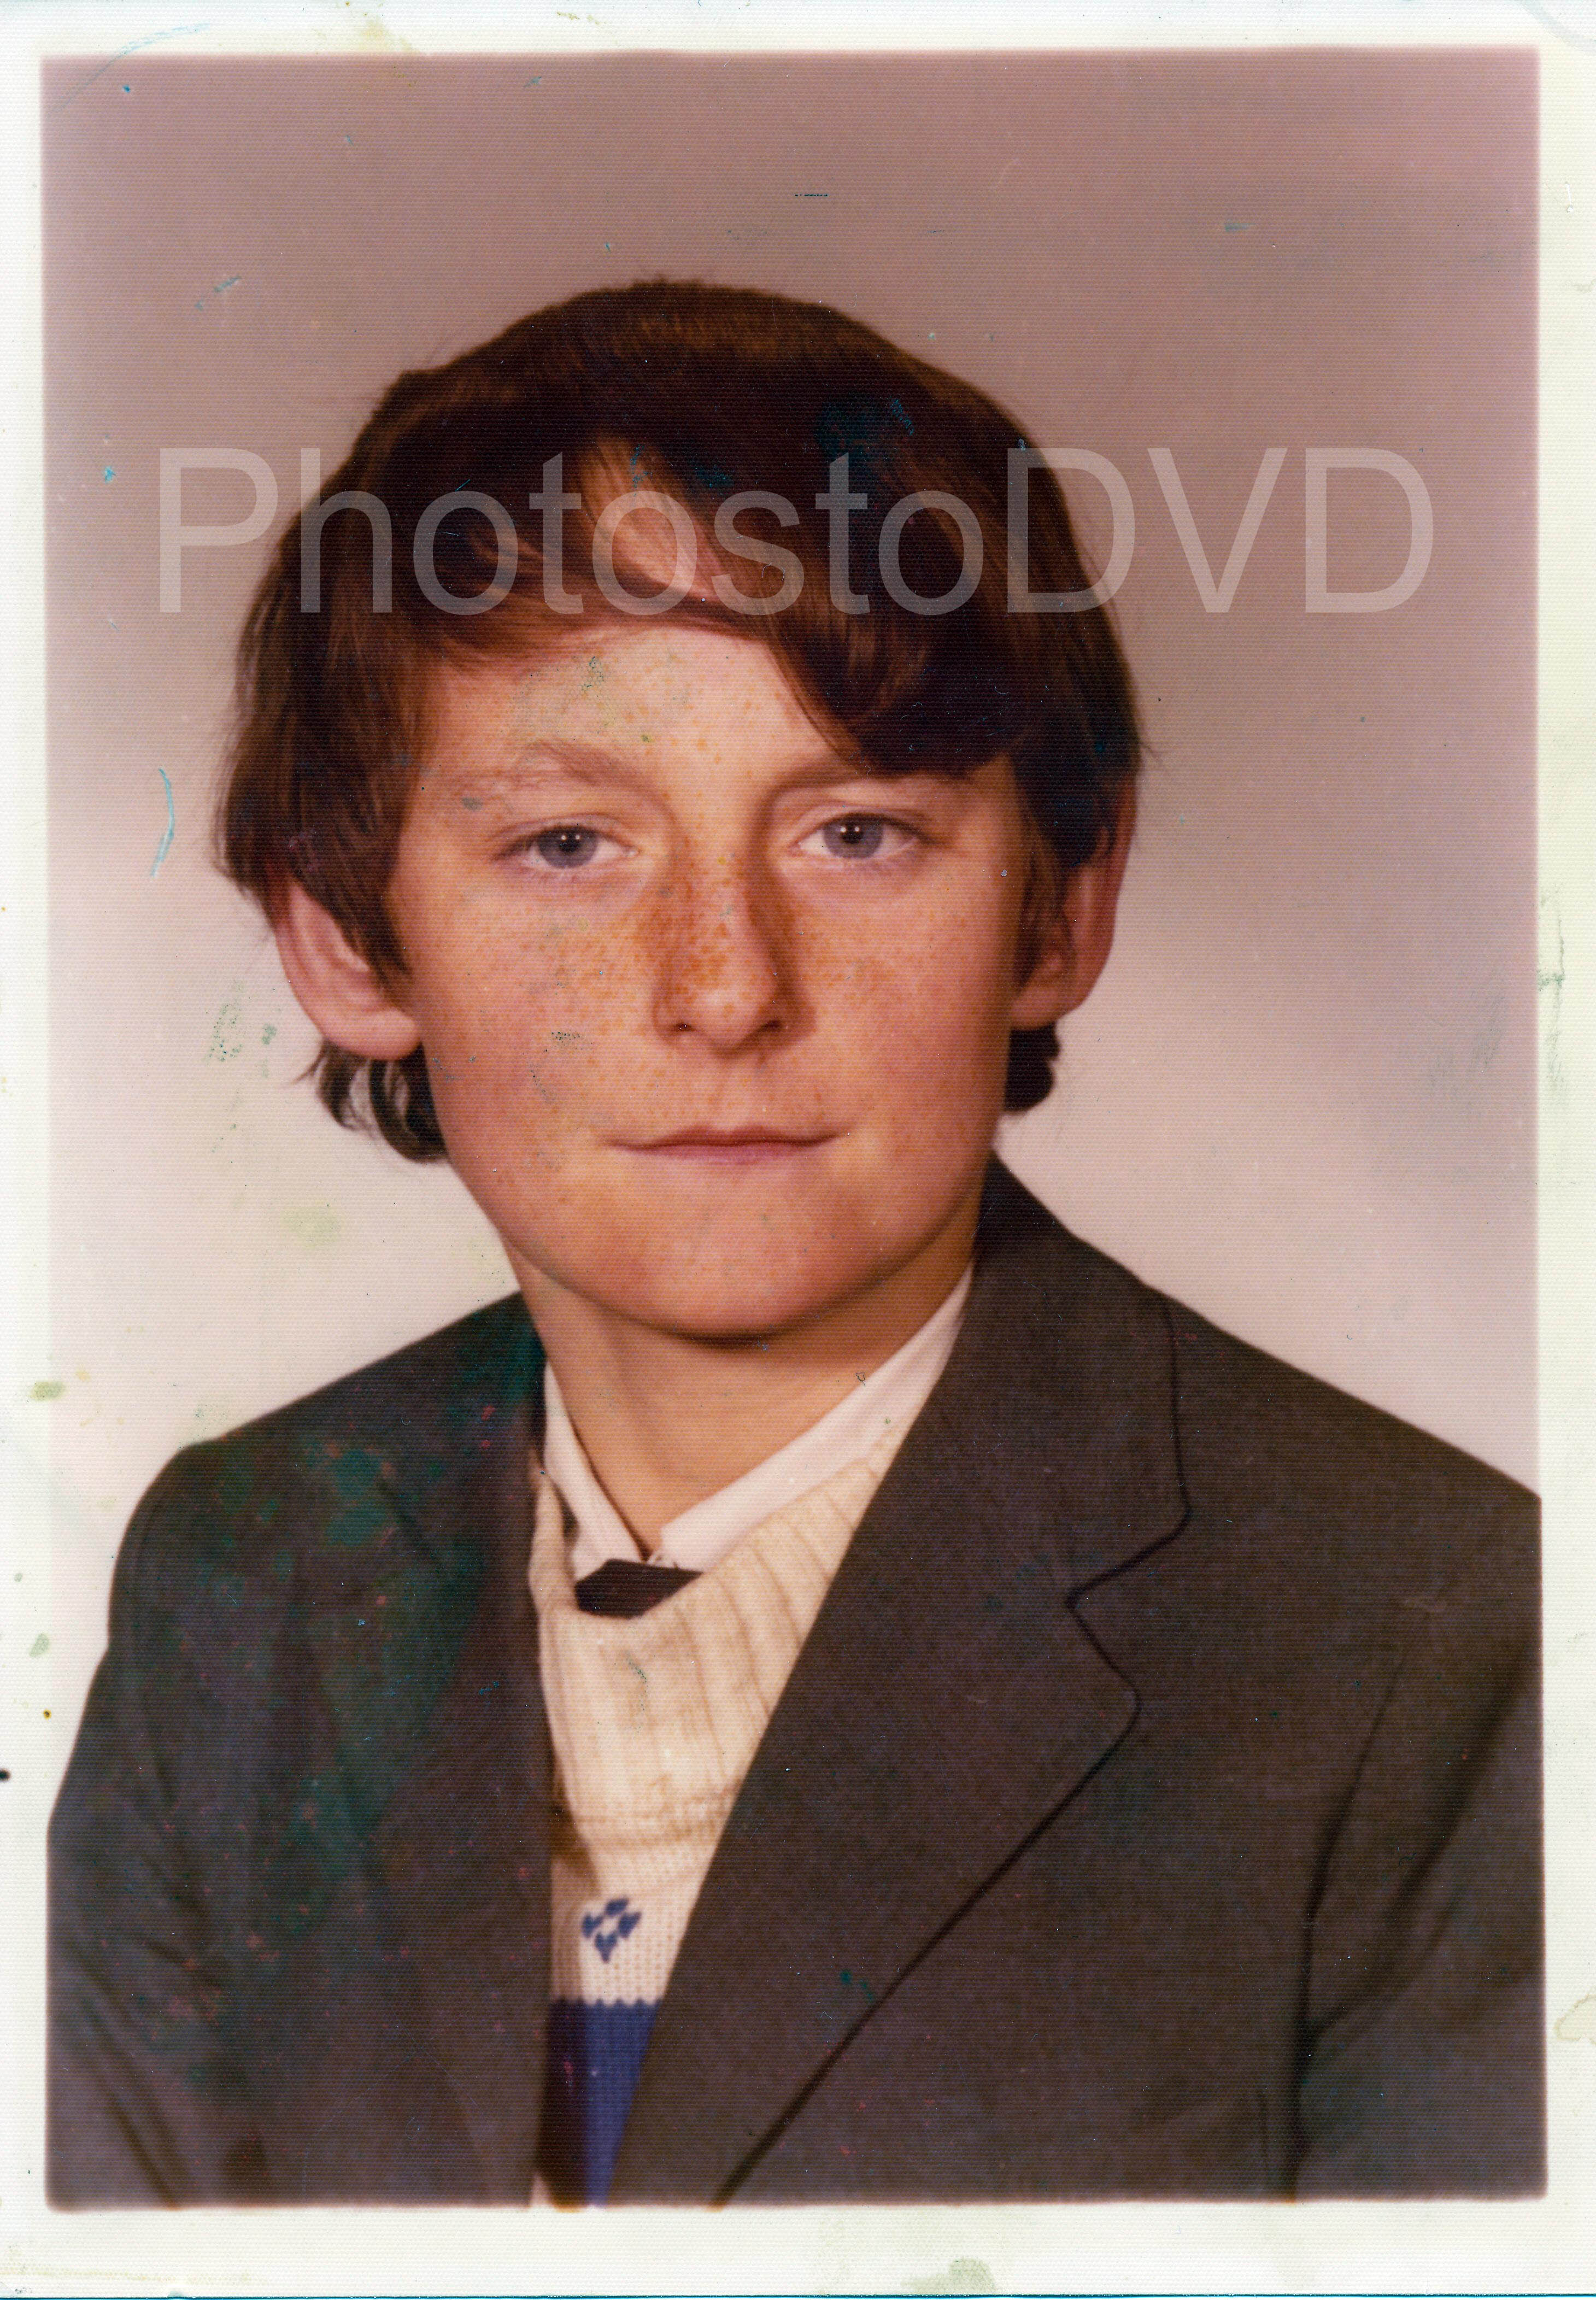
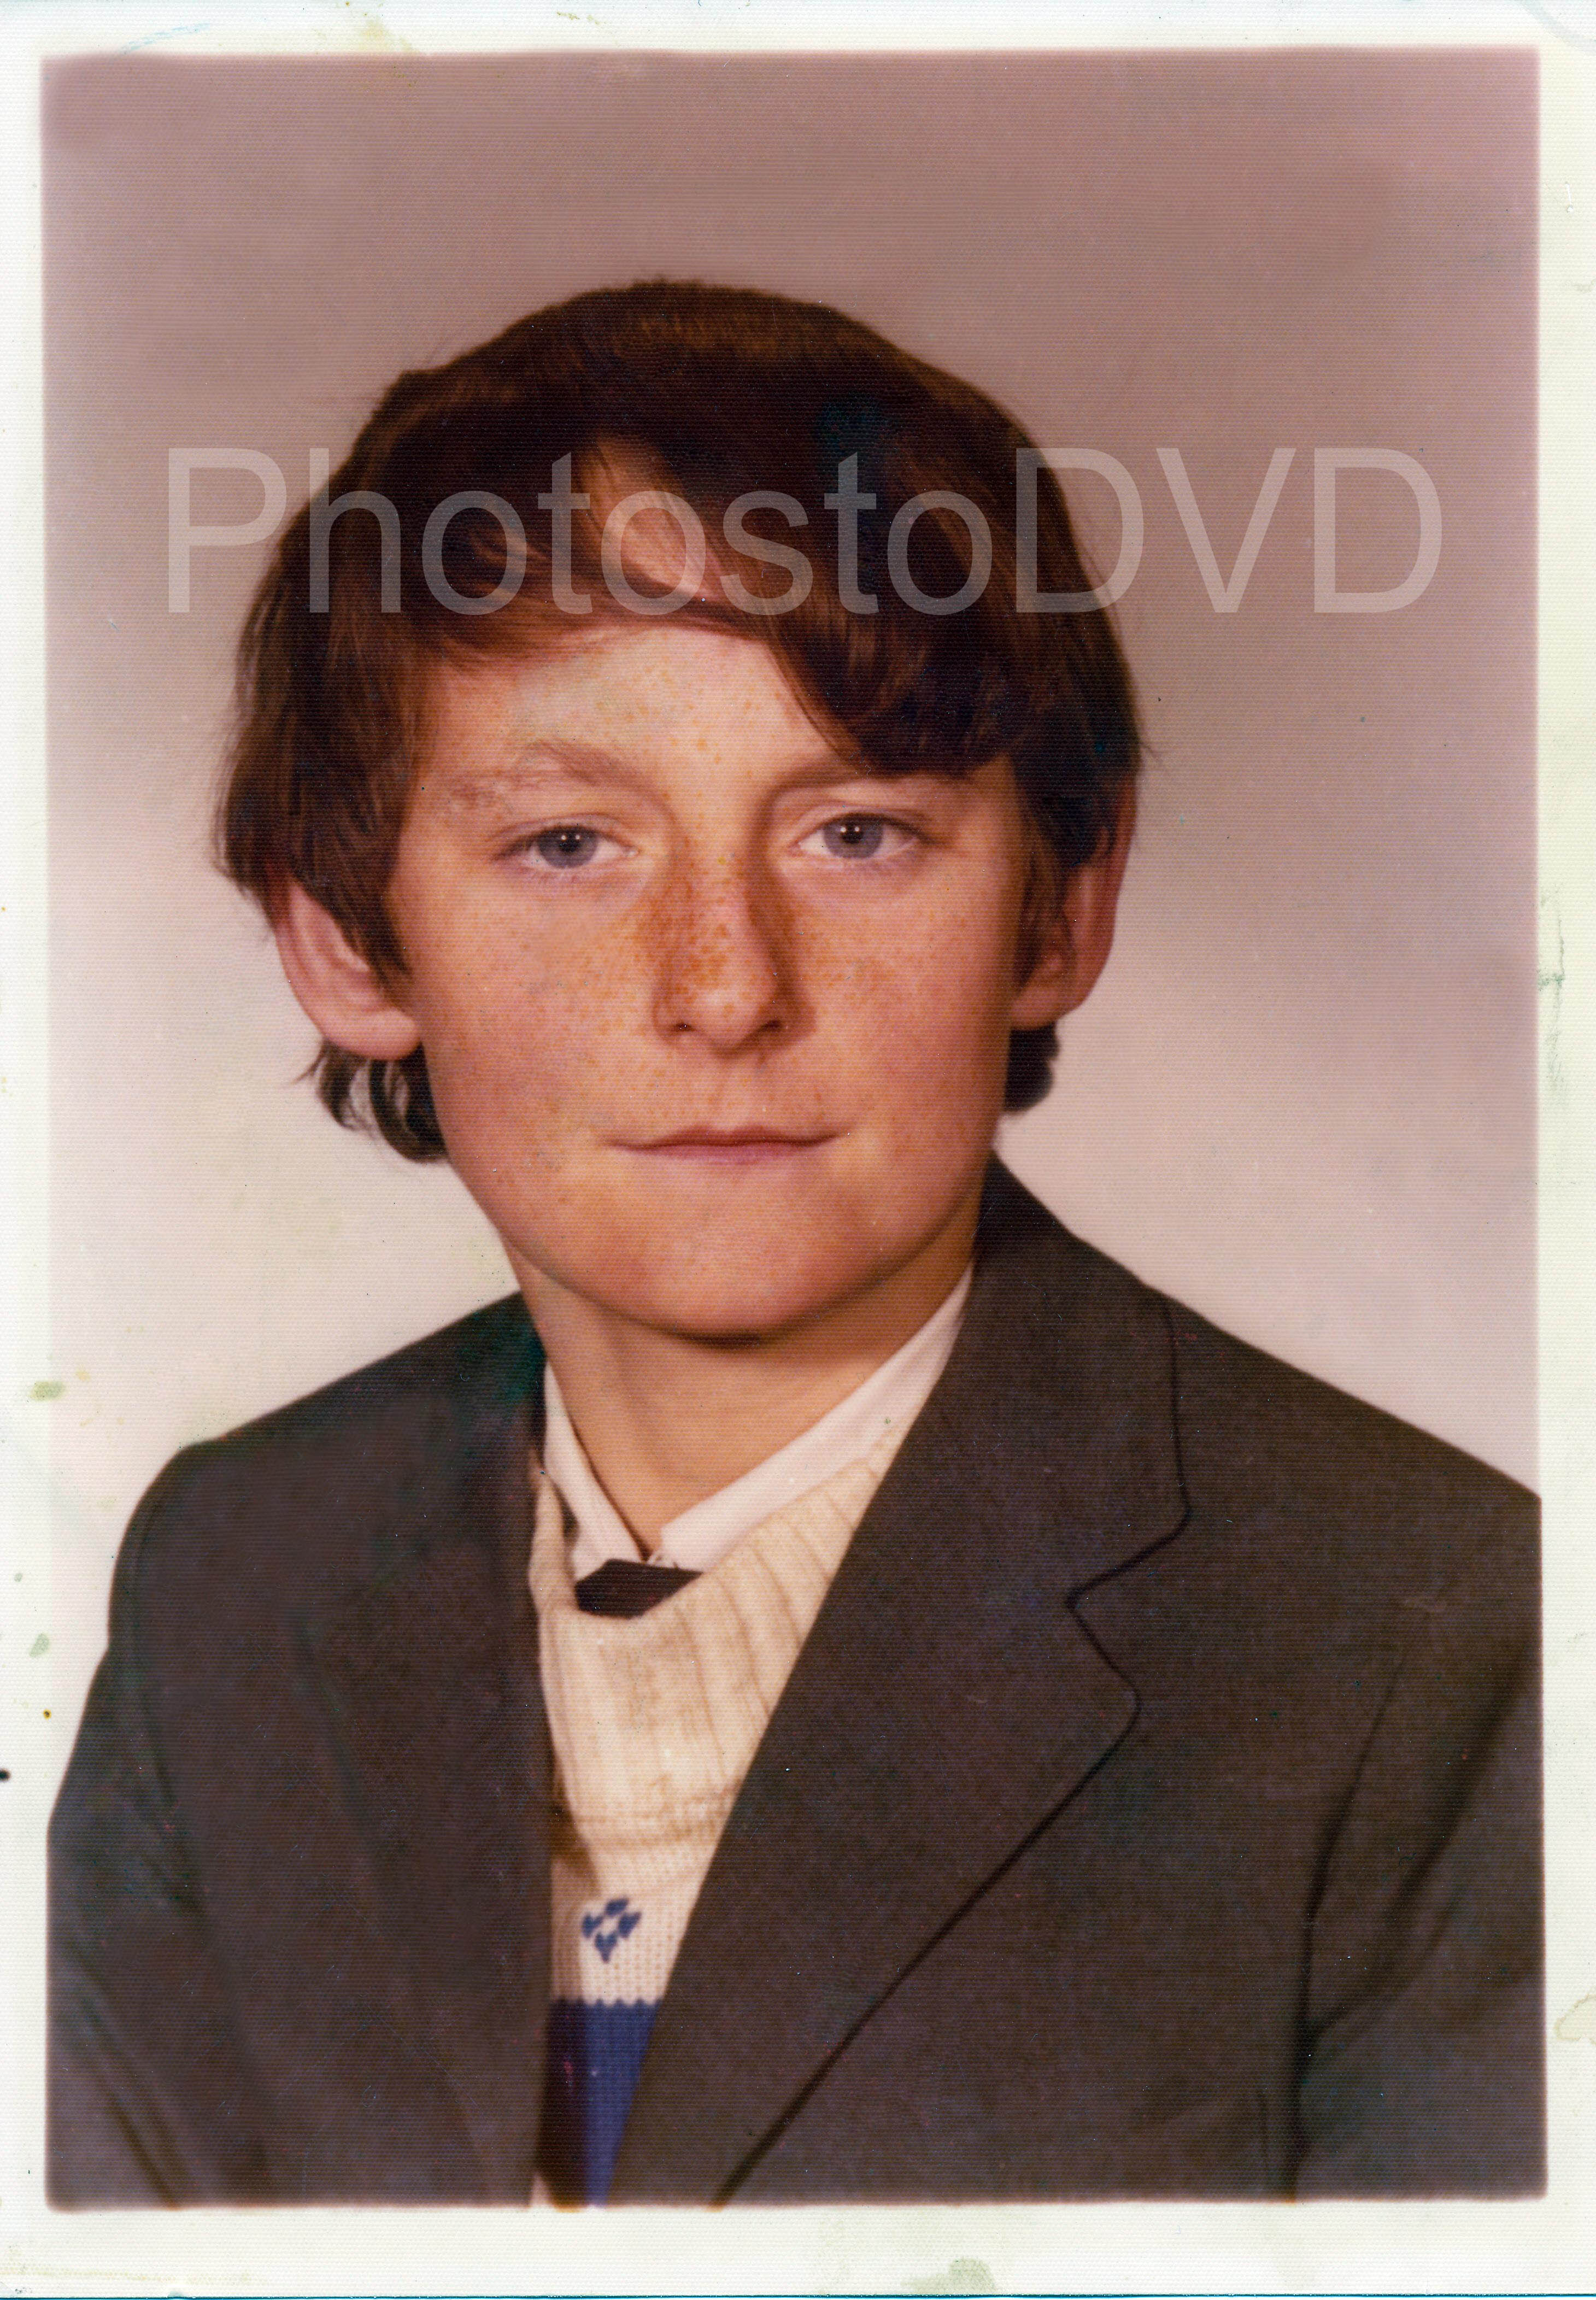
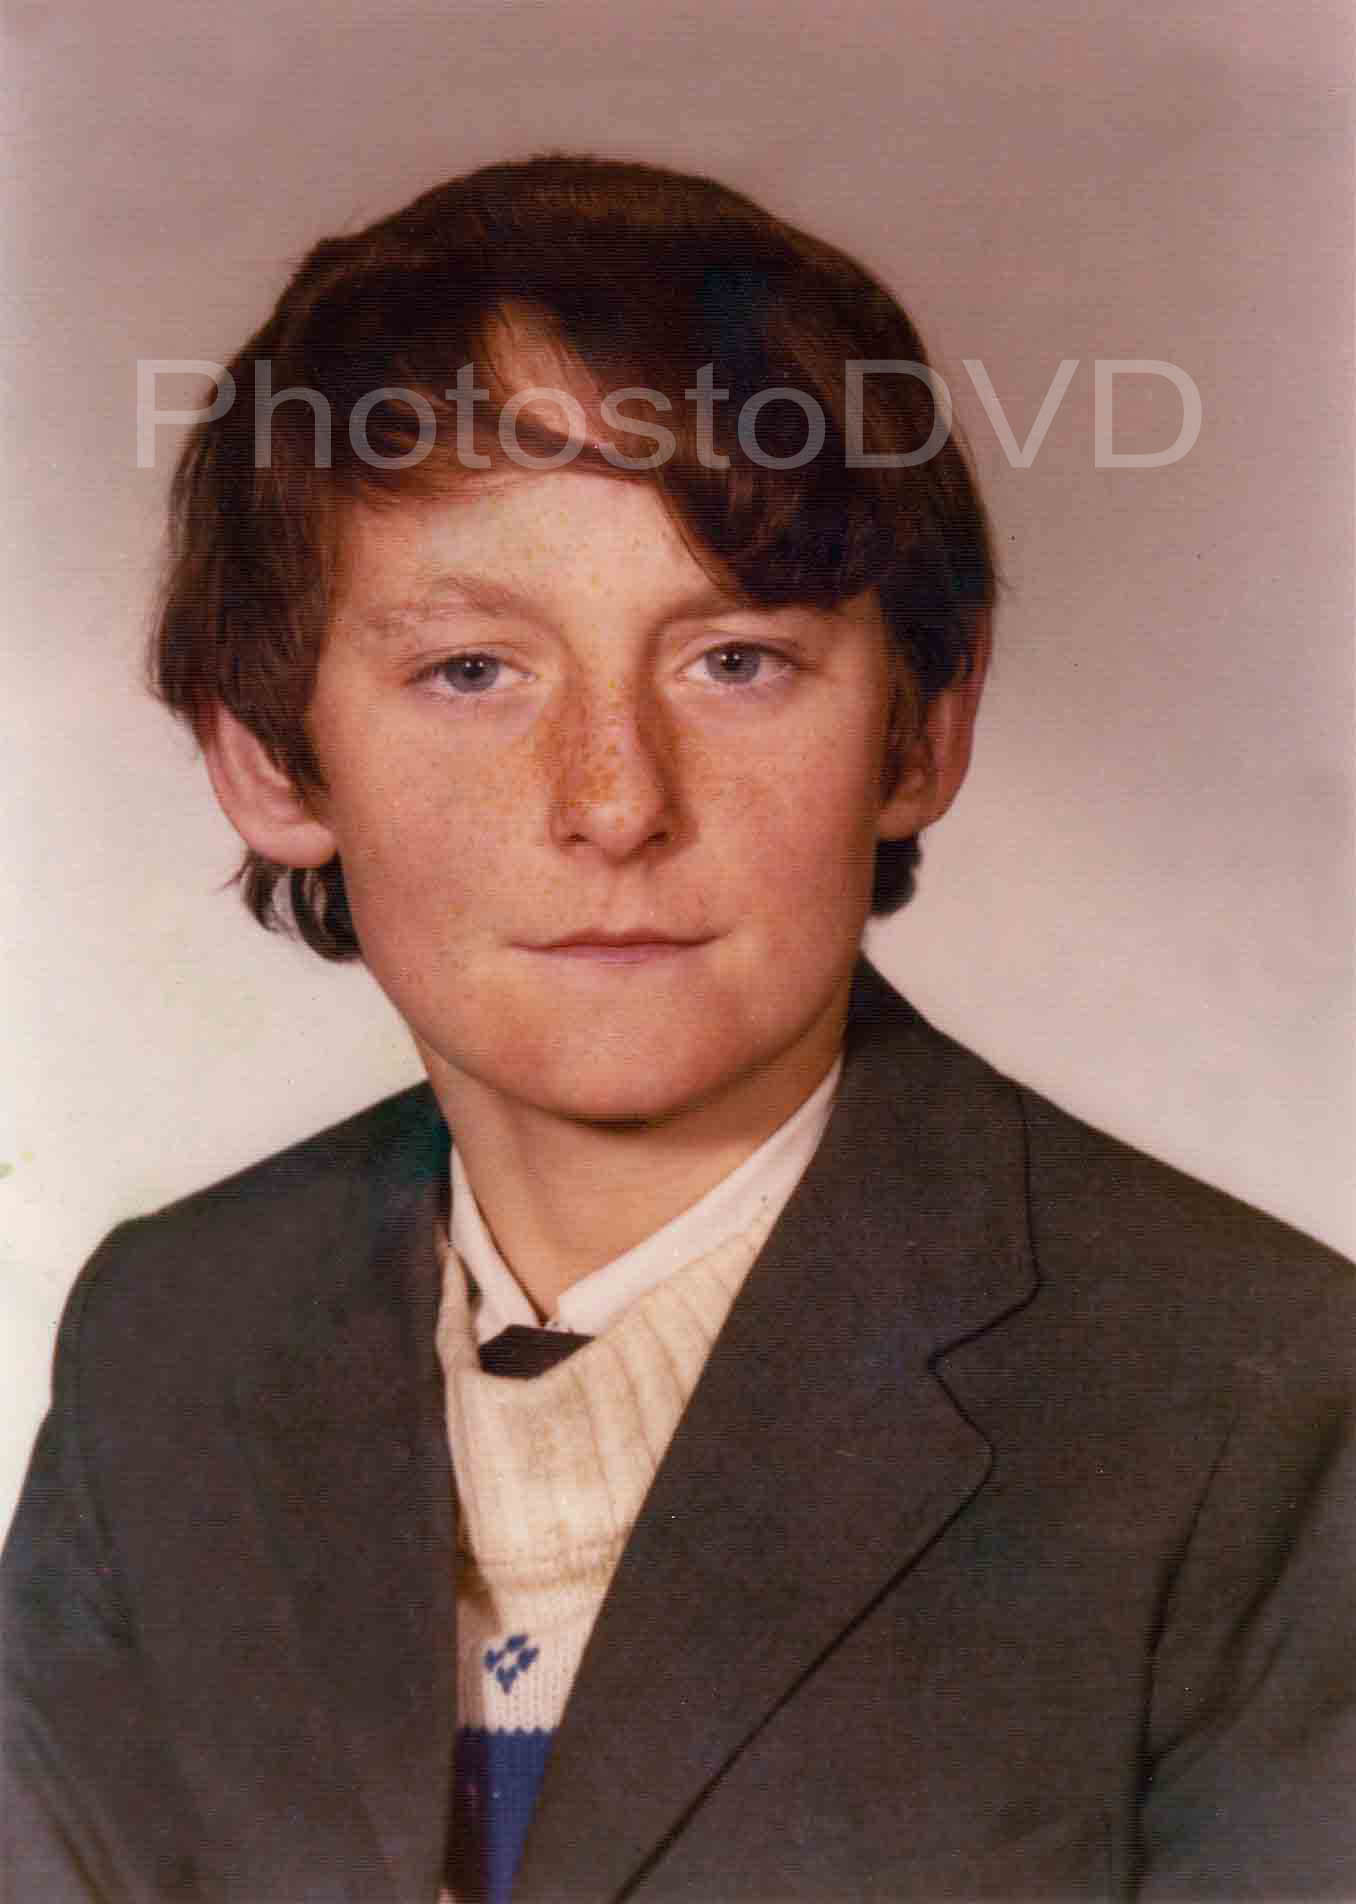
Sample 5:
The next set of examples show how an old marked and faded
photograph can be improved. In order to really see the differences, you
will need to right click and save the pictures to your desktop. You can
download the full set all in one go from
here.
Firstly you can compare the original 600dpi scanned version (left) with another showing Basic Enhancement (right).
After Full Enhancement the blue markings near the right ear and on his jacket have been removed (left) and the picture has been trimmed (right).
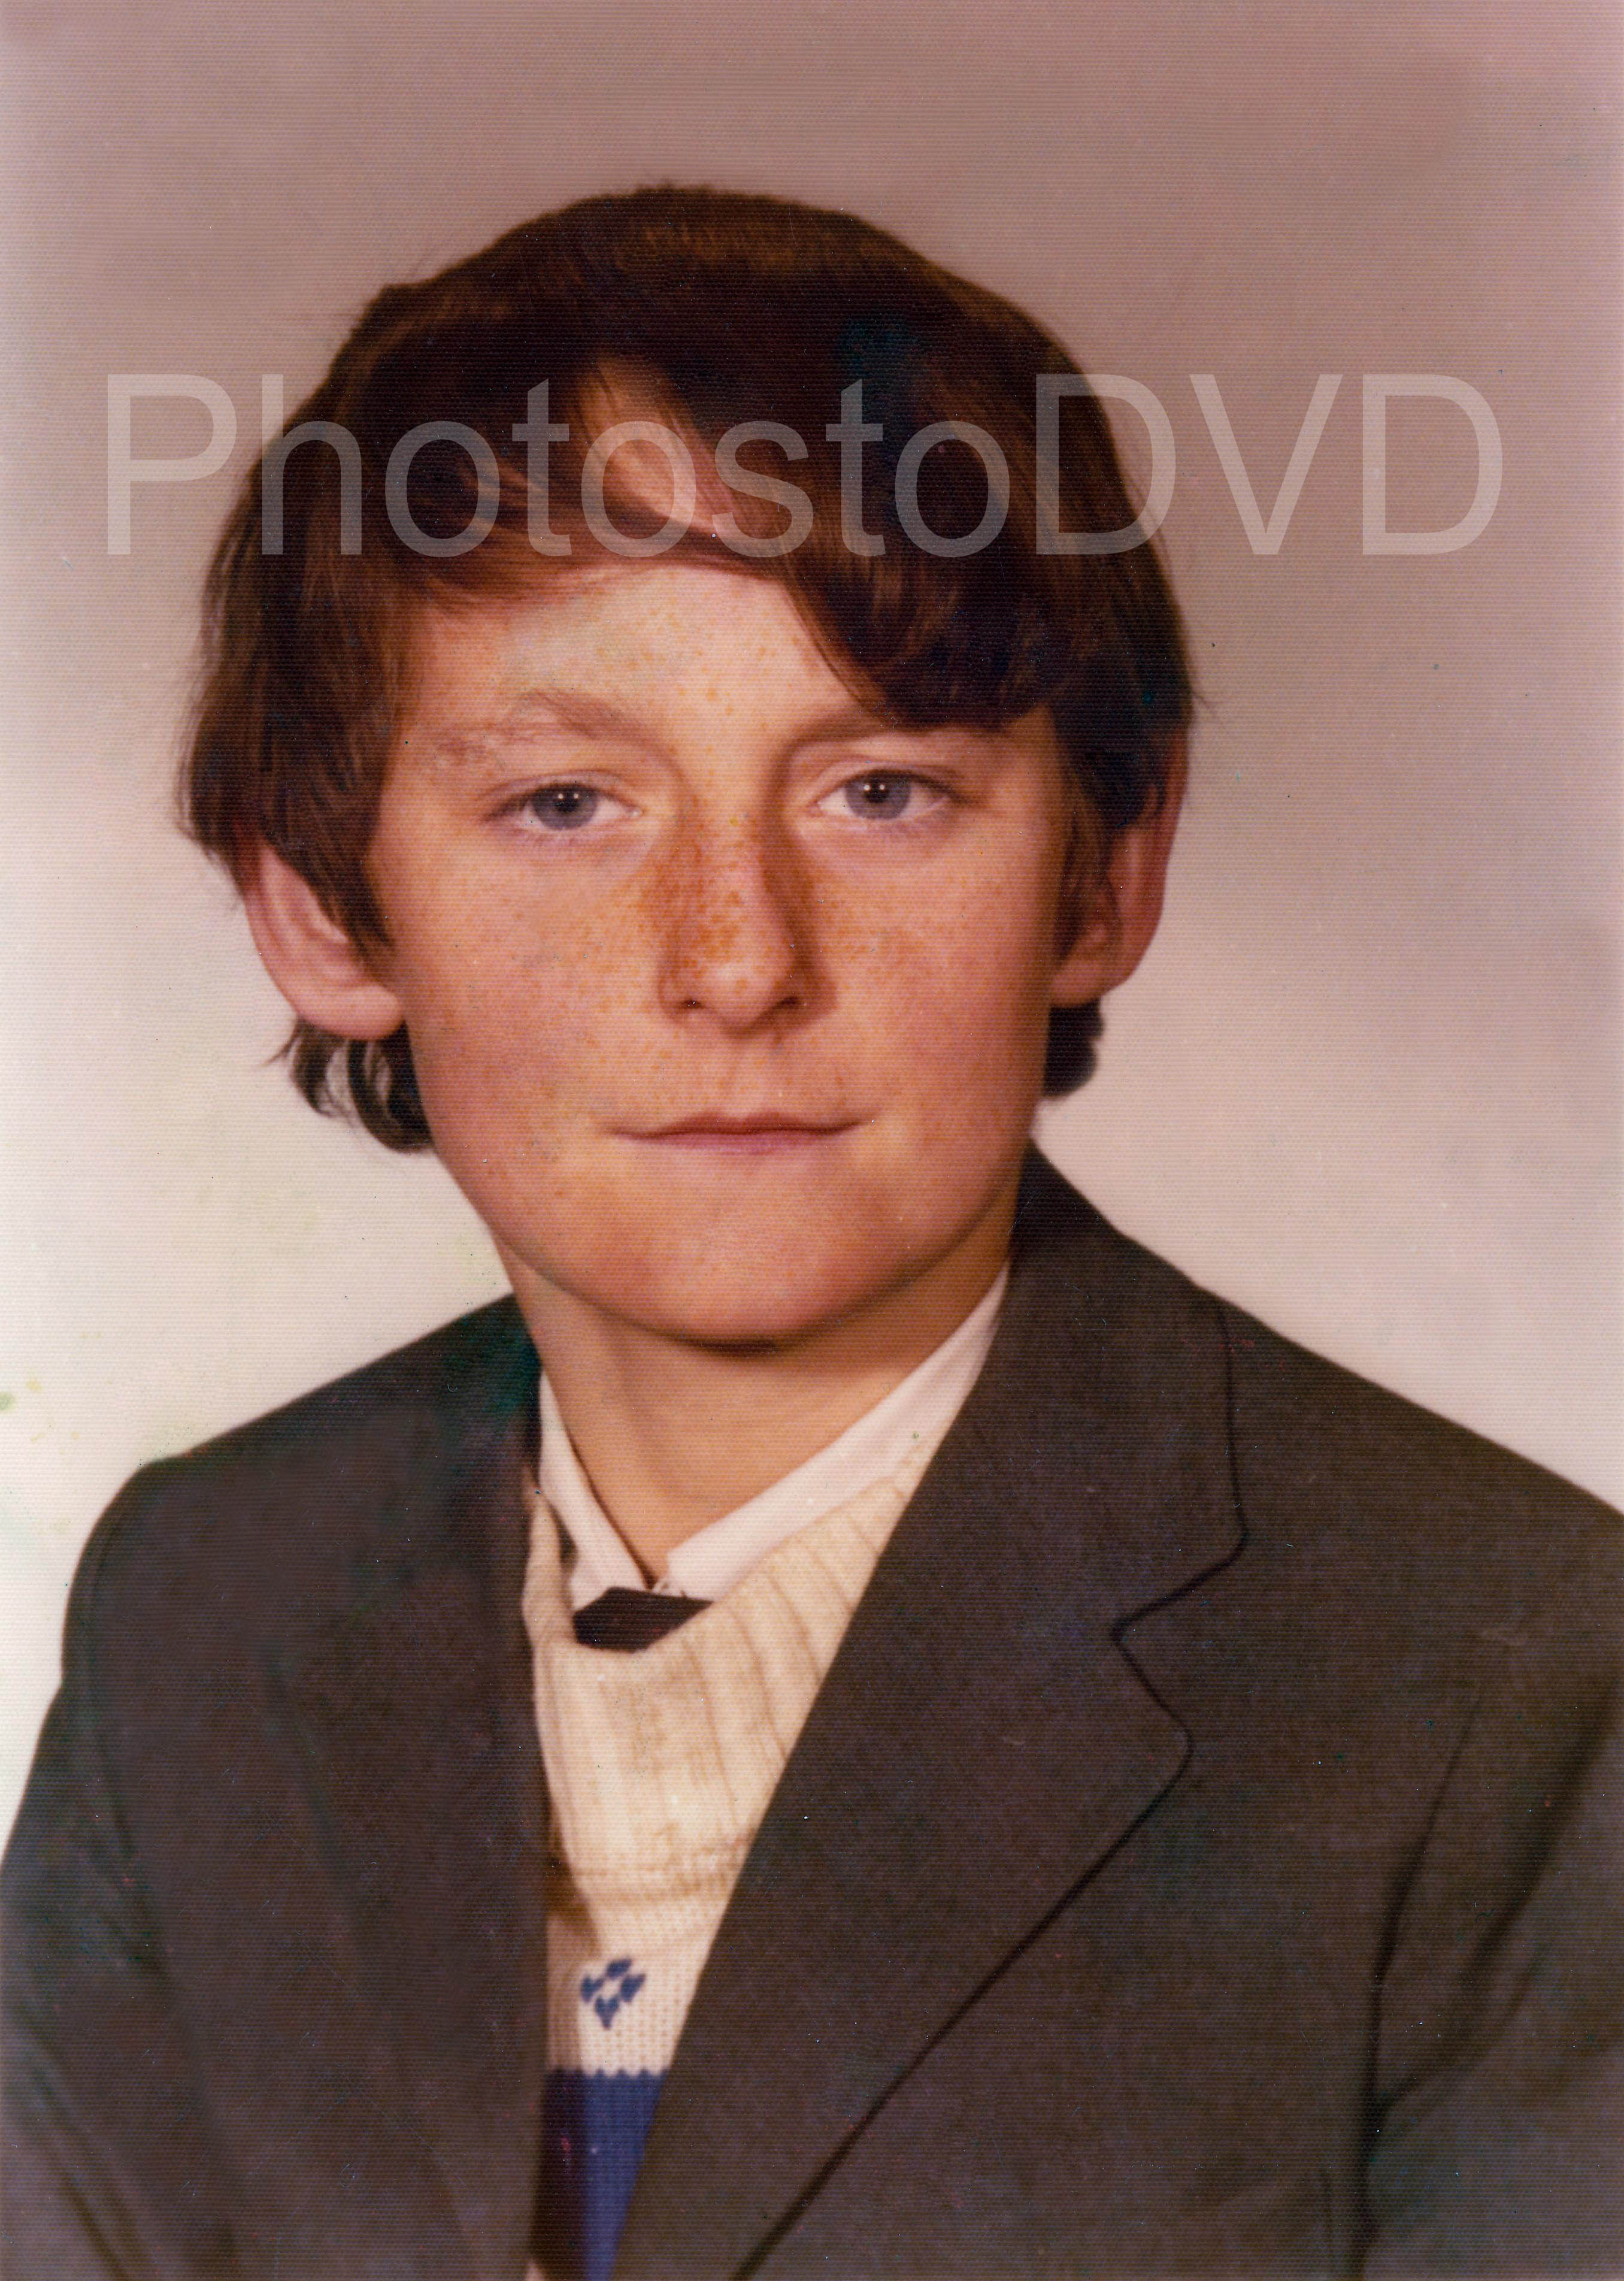
These two samples show the difference in quality when using different scan resolutions. The one on the left is 300dpi and the one on the right is 100dpi. The effects of pixilation is quite striking especially on the jacket. On a web page the difference is hardly noticeable but it most certainly is when you zoom in to them with your Picture Viewer program on your PC or if you try to print them out.

Remember you can download Samples 1-4 from here and Samples 5 from here.